No meter.
No autofocus.
No screen.
That's the character of a 1968 Leitz Wetzlar M4 — so you read the light with a KEKS meter clipped on top (and Sunny 16 as backup), focus by eye, and commit each frame to film. This is the whole craft, built around the exact camera and lens in your hands, and the coast of Maine you're about to point it at.
A photograph is light, frozen in silver.
Your iPhone turns light into numbers. Film turns light into chemistry — a physical change you later hold up to a window. That one difference explains almost everything the M4 asks of you.
The latent image
Film is plastic coated with an emulsion of light-sensitive silver-halide crystals. When you press the shutter, light strikes them and quietly rearranges them. Nothing is visible yet — this hidden record is the latent image.
Development turns exposed crystals into dark metallic silver and washes the rest away. Where lots of light hit, the negative goes dark; where little hit, it stays clear. That reversal is why it's a negative.
Sensor vs. emulsion
- A sensor meters constantly; film records exactly once, when the shutter opens.
- No screen, no histogram, no instant redo. You commit, then wait.
- Film has a fixed ISO for the whole roll — load 400 and every frame is shot at 400.
- It forgives overexposure far more than underexposure. When unsure, let a little extra light in.
The exposure triangle
Three controls decide how much light reaches the film and how the picture looks: aperture (how wide the lens opens), shutter speed (how long it stays open), and ISO (the film's sensitivity). Change one and you trade something away. Move the sliders and watch the same scene change.
A middle aperture — a safe everyday choice.
Fast enough to handhold and freeze ordinary movement.
ISO 200–400 is the forgiving all-rounder for a first roll.
The needle is centred. This is what you're aiming for.
One body, one lens, no menus.
A 1968 Wetzlar M4 (#1192258) with a Summilux 50mm f/1.4 — a brick of brass and glass that does nothing on its own. Everything it asks of you is mechanical and visible. Get to know the controls before you load film.
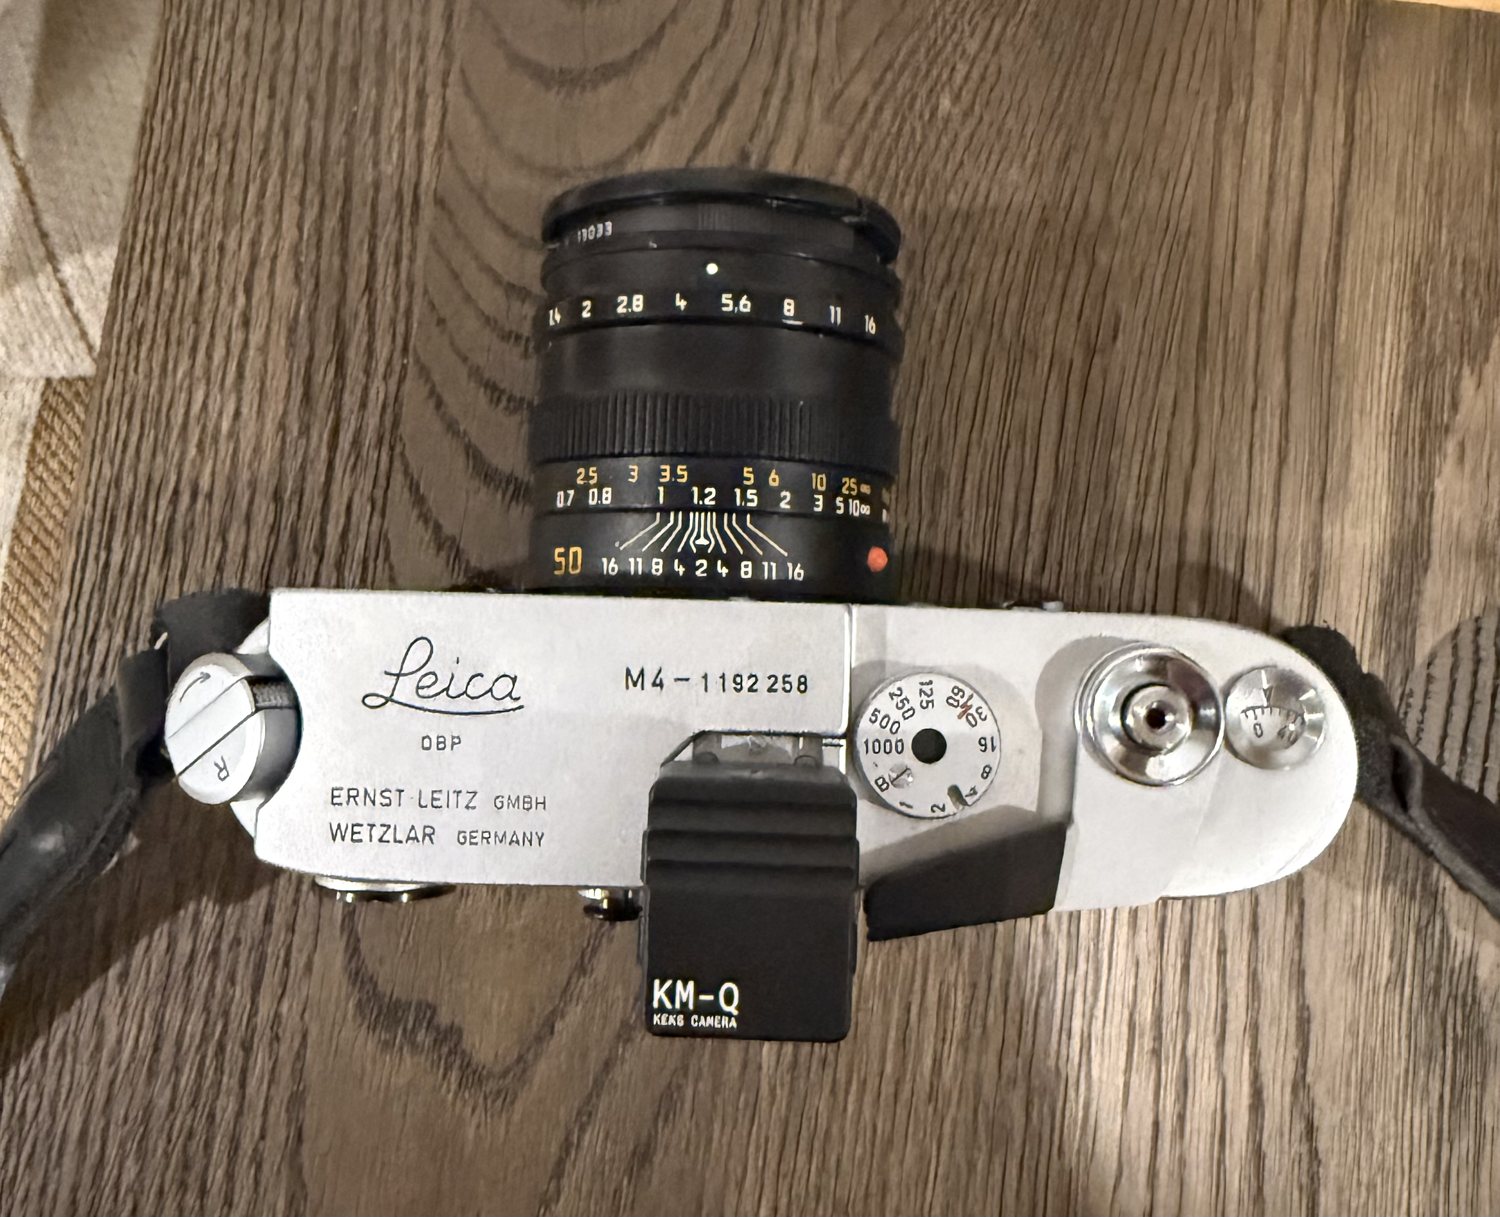
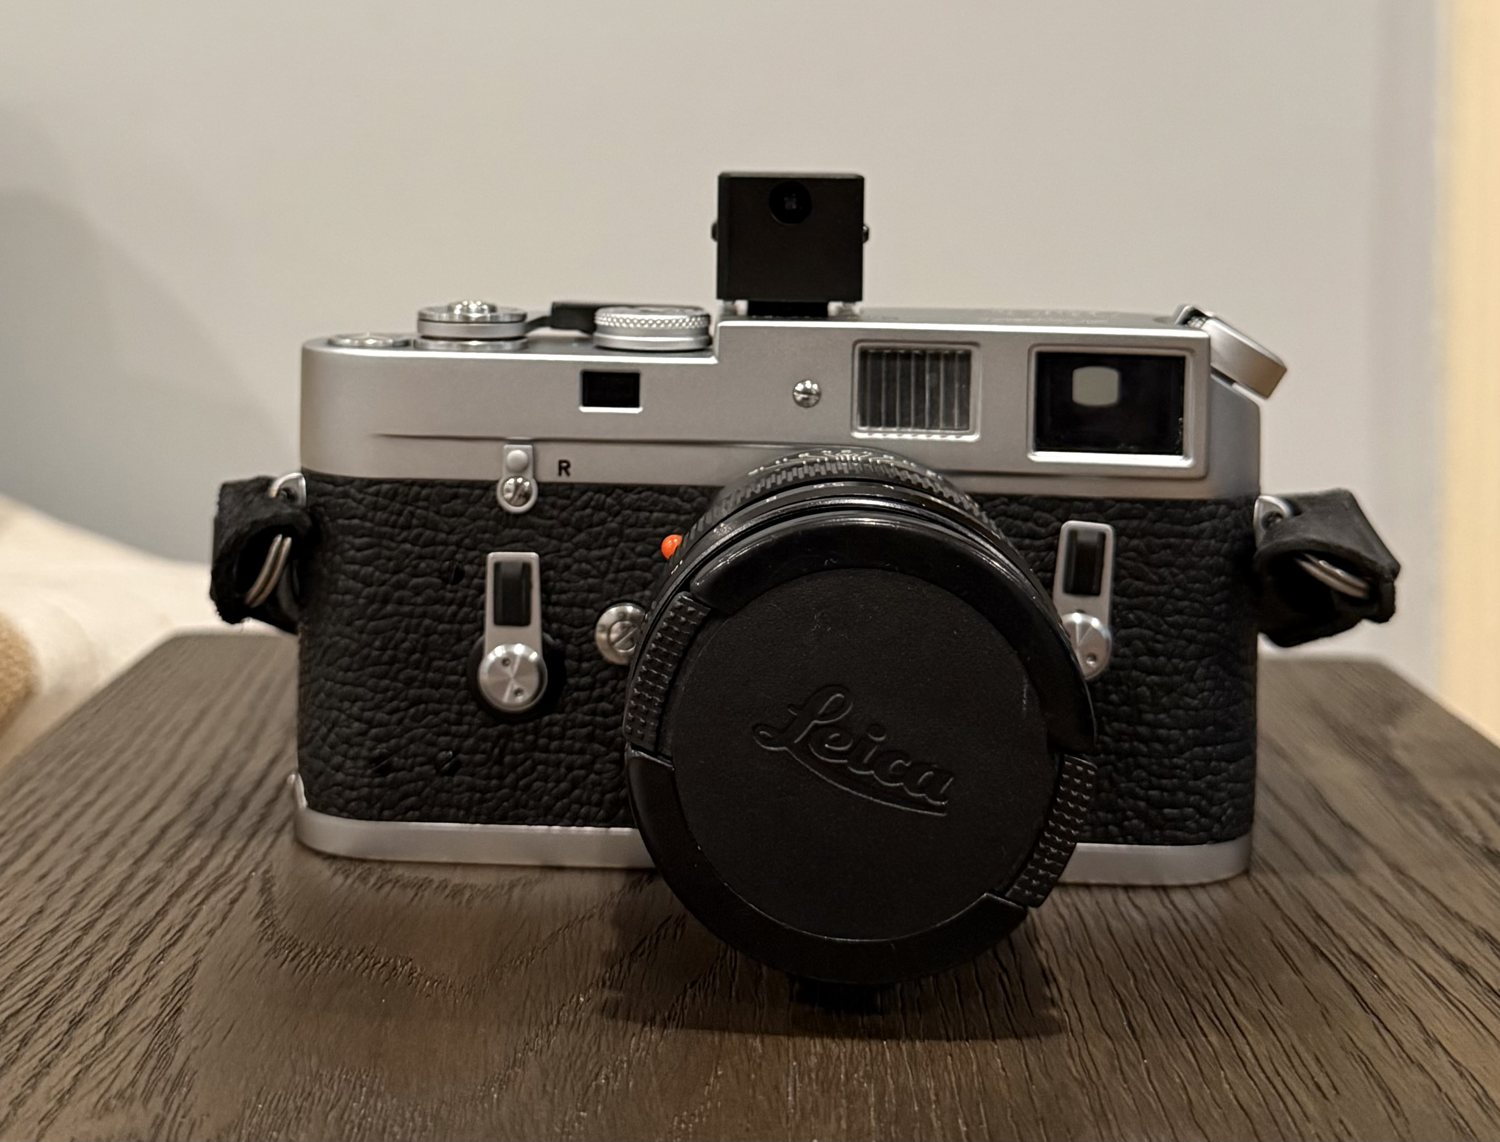
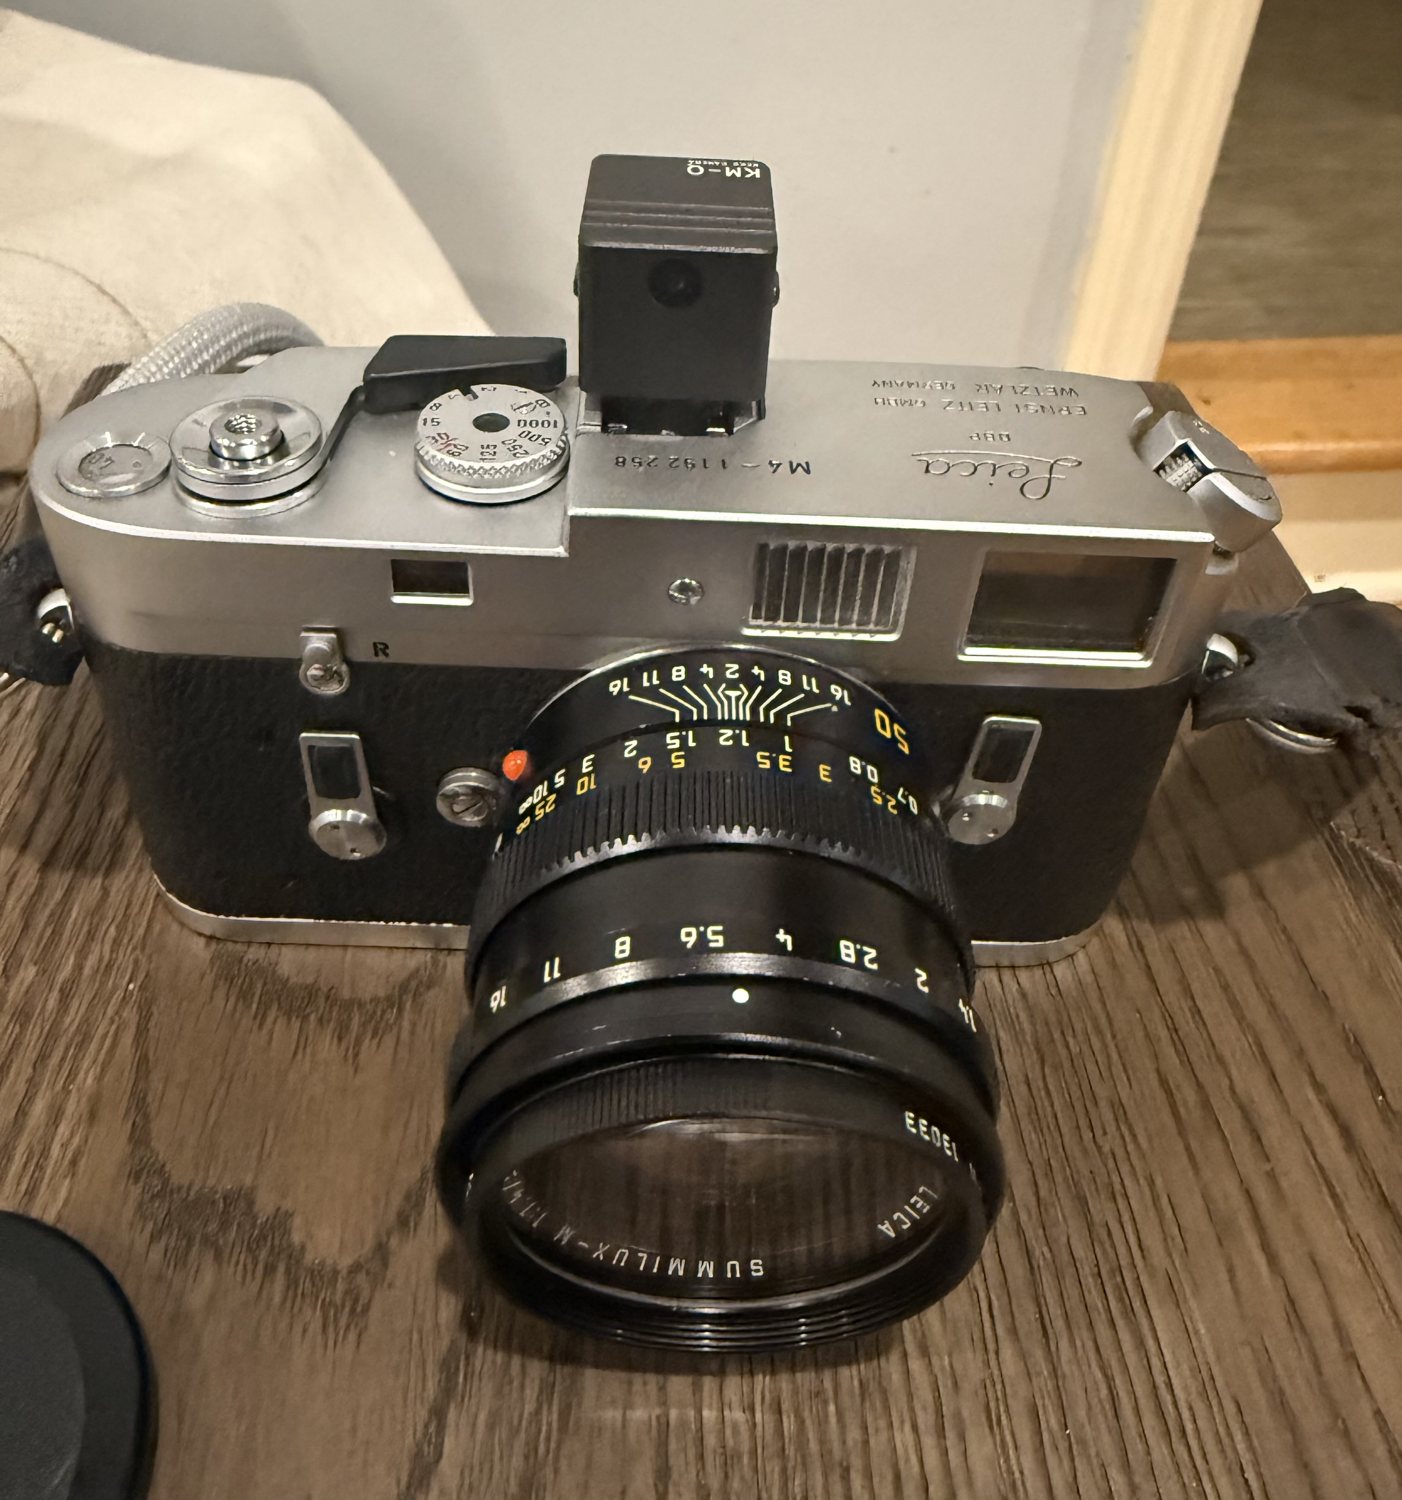
Your actual camera — serial, lens, brassing and all.
Summilux-M 50mm f/1.4 (pre-ASPH)
Your 'normal' lens, close to how the eye sees, and famously fast at f/1.4. The outer ring sets aperture (f/1.4–f/16); the knurled ring focuses down to 0.7m. Turn it until the rangefinder patch aligns. Takes 46mm (E46) filters.
At a glance
- Camera
- Leica M4, no. 1192258
- Made
- 1968 · Ernst Leitz, Wetzlar
- Type
- 35mm rangefinder, fully mechanical
- Metering
- None built in — KEKS KM-Q on the shoe (+ Sunny 16)
- Lens
- Summilux-M 50mm f/1.4 (pre-ASPH, E46)
- Aperture
- f/1.4 – f/16
- Min focus
- 0.7 m
- Shutter
- 1s – 1/1000 + B · flash sync 1/50
- Viewfinder
- 0.72× · frame-lines 35/50/90/135
Go to the source
The real manuals and reference material live on the open web:
- Butkus manual archive — Leica M4-P PDF (donation requested; M4 handling is the same)
- Wikipedia — Leica M4 history
- Macfilos — the story of the M4
SERIAL 1192258 dates the body to 1968. The lens carries its own serial on the front ring — read it off and the tutor below can date the Summilux too.
You are the camera's brain.
Three jobs the M4 won't do for you: read the light, focus the lens, and load the film. You've got a KEKS meter for the first — here's how to use it, plus the by-eye backup and everything else.
Using the KEKS KM-Q
The KM-Q is a small reflective meter sitting in your accessory shoe. It reads the light bouncing off whatever it's pointed at and hands you an exposure. The flow:
- 01Set the meter's ISO to match your film (e.g. 400 for HP5). Do this once per roll.
- 02Point it at your subject and read the aperture / shutter pair it gives you.
- 03Transfer those to the lens aperture ring and the shutter-speed dial. Shoot.
Sunny 16 — metering by eye
Learn this so you can shoot if the KEKS battery dies, and to sanity-check what the meter tells you. The rule: in bright sun, set aperture to f/16 and shutter to about 1 ÷ ISO, then open one stop per step the light drops. Pick your film and the weather:
Bright sun — hard, distinct shadows. Dial these in and shoot.
Focusing the rangefinder
In the centre of the 0.72× viewfinder is a bright patch. Anything out of focus shows there as a double image. Turn the Summilux's focus ring until the two images merge into one — that's focus locked. Drag to simulate turning the ring.
You're focusing a patch, not looking through the lens — fast and precise once it's muscle memory. At f/1.4 your depth of focus is paper-thin, so nail the patch.
Loading film, step by step
The one fiddly part of an M camera. Run through it once with a dead roll in good light before you rely on it.
- 01Wind the lever and fire once to be sure the camera is empty, then turn the rewind crank gently — no resistance means no film inside.
- 02Pull the rewind crank up and remove the baseplate (swing the back open). Drop the new cassette into the left chamber.
- 03Pull the film leader across and tuck its tip into the slots of the multi-prong take-up on the right.
- 04Lay the film flat over the sprockets, replace the baseplate, and confirm the teeth have caught the perforations.
- 05Wind and fire twice to clear the leader. Watch the rewind crank turn as you advance — proof the film is moving.
- 06Set the film-speed reminder on the back to your ISO. It's just a memo, but it stops you forgetting what's loaded.
Light & composition
Shoot the edges of the day
Early and late light is low, warm and directional. The hour after sunrise over the water is the prize in Maine.
Use f/1.4 with intent
Your Summilux opens wider than almost anything. Wide open it isolates a subject in glow; it also rescues dim dawn light. Stop down to f/5.6–8 when you want the whole scene sharp.
Find a foreground
A 50mm rewards depth. Put a rock, a railing, a person between you and the view so the eye has a way in.
Lines lead the eye
Docks, shorelines, roads and fences are natural leading lines — let them run from a corner toward your subject.
Place, don't centre
Set the horizon a third up or down rather than splitting the frame; off-centre subjects feel less static.
Work the scene
Take the obvious frame, then move — closer, lower, around — and take three more. Film is cheap against the trip.
Pack light. Read the light.
A one-screen reference for the trip — built to scan with your thumb while the camera's in your other hand.
Your first roll — buy before you go
You don't have film yet, so start forgiving. Grab a few rolls of a 400-speed stock — fast enough for changeable coastal weather, with latitude to survive early metering guesses.
Ilford HP5 Plus 400. Classic, hard to kill, and the natural choice if you'll develop it yourself later. Maine's moody skies and weathered wood are made for black and white.
Kodak Gold 200 for sunny, warm days, or Portra 400 for a forgiving, flattering colour film if you don't mind paying more.
Buy 3–4 rolls and keep a spare in the bag — running out mid-shore is the one avoidable regret.
Sunny 16 — quick table
Backup for when you're not metering with the KEKS. For ISO 400, set shutter to 1/500 and pick the aperture:
| Bright sun | f/16 |
| Hazy sun | f/11 |
| Cloudy bright | f/8 |
| Overcast | f/5.6 |
| Open shade / golden | f/4 |
Shooting ISO 200? Use 1/250, same apertures. When unsure, open up half a stop.
Before you leave the house
- Film loaded, ISO set on both the camera memo and the KEKS
- A spare roll or two in the bag
- Lens cap off — the classic M mistake
- Advance lever wound, ready for frame one
- KEKS battery good; lens clean, cloth packed
Before each shot
- Meter with the KEKS (or Sunny 16) → set aperture & shutter
- Focus: merge the patch in the viewfinder
- Frame inside the 50mm lines — mind parallax up close
- Brace, breathe out, squeeze the release
- Advance immediately so you're always ready
When the roll is finished
Wind it all the way back with the crank until tension releases, open the baseplate, and store the cassette somewhere cool and dark. Don't reopen the camera in light. Then develop it (or do it yourself — next section).
Where the picture finally appears.
Everything so far has been about capturing a latent image you can't see. Development is the chemistry that reveals it — and you can eventually do it at your own sink.
Negative to positive
The negative: bright parts of the scene are dark, dark parts are clear. A real colour negative also carries an orange mask.
What a negative is
On a developed negative the tones are reversed: the brightest parts of your scene look darkest on the film. Scanning or printing flips it back. Each frame is a small, permanent, analog original — no file, just silver on plastic.
For your first rolls, let a lab develop and scan them. It's cheap, removes a variable while you're learning to shoot, and tells you whether your exposures are landing before you add chemistry.
Developing it yourself — start with black & white
Home B&W is approachable: room-temperature-tolerant, inexpensive, deeply satisfying. (Colour C-41 needs tighter temperature control, so it's the next step.) The kit and the flow:
Changing bag
A light-tight cloth bag. You load the film onto the reel inside it, by feel — the only step that needs total darkness.
Developing tank + reels
A light-tight tank (Paterson is the standard) holds the film on a spiral so chemistry reaches it evenly. After loading, the rest is done in daylight.
Chemistry: developer, stop, fixer
Developer turns the latent image to silver; stop halts it; fixer makes it permanent and light-safe. Then a good wash.
Thermometer + timer
B&W is forgiving but not lawless — temperature and time set your contrast. A thermometer, timer and measuring cylinders keep you honest.
The develop-at-home flow
- 01Load the exposed film onto the reel inside the changing bag and seal it in the tank. Lights on now.
- 02Mix developer to temperature (often ~20°C/68°F), pour in, and agitate on schedule for your film/developer time.
- 03Pour out, rinse with stop bath, then fix. Both are quick and tolerant.
- 04Wash thoroughly in running water, add a drop of wetting agent, and hang to dry somewhere dust-free.
- 05Once dry, cut into strips and scan (flatbed, or a camera + light source) to get digital positives.
Only loading the reel needs darkness, and the changing bag handles that. Everything else is in normal light.
A note on chemistry: developing chemicals are manageable with basic care — gloves, ventilation, follow the labels. Treat them like any household solvent and you'll be fine.